A list of swatch pictures and blog posts after the jump
Showing posts with label black. Show all posts
Showing posts with label black. Show all posts
Sunday, 6 December 2020

Wednesday, 18 April 2012
China Glaze: Luxe and Lush swatch

From District 1 of the Hunger Games comes Luxe and Lush. In the bottle there appears to be a soft, blue-purple with a slight gold, but it appears very differently on the nail. I think on the nail it is more orange and green with a sharp hint of gold.
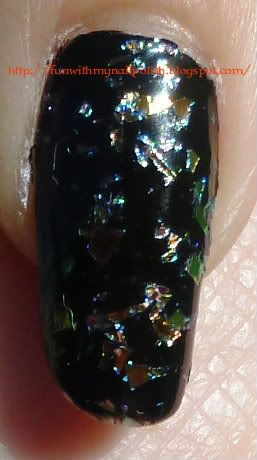
Luxe and Lushover Sally Girl Mini Nail Polish:Poser. You can see Poser by itself here.
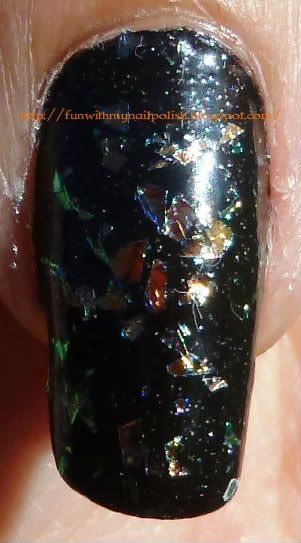
Luxe and Lushover FingerPaints: Where Art Renoir?
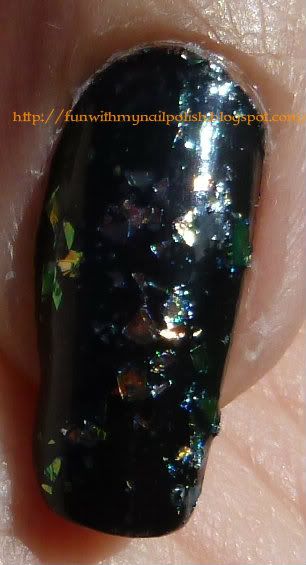
Luxe and Lushover China Glaze: Smoke and Ashes
These products were bought with my own money for review by myself.
This is the second book in the Hunger Games series. I haven't read it yet, because I am waiting for it to come out in paperback, but since I plan on reading it I figured that I would go ahead and recommend it. Plus it goes with the nail polish today.
Thursday, 12 April 2012
China Glaze: Smoke and Ashes swatch

From District 12 of the Hunger Games is Smoke and Ashes.
I have read a few reviews that comment on the subtle green glitter, but to me when the color was on my nail it seemed a bit blue.
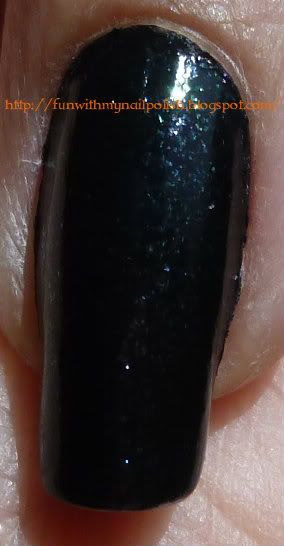
Either way, this went on very easily! It was a one coater, which for me almost never happens since I tend to paint my nails very thinly. I love the color and the polish wasn't rough at all, which some times happens with glitter polishes.
These products were bought with my own money for review by myself.
I read some where that someone (I can't remember who, sorry) was disappointed in how a book that was against materialism had it's own nail polish line. I don't agree that materialism is that the book is really about, but I figure that I will start recommending books through my Amazon Associates links now... not really sure if that combats materialism, but worth a shot, right?
Wednesday, 11 April 2012
Finger Paints: Where Art Renoir? swatch
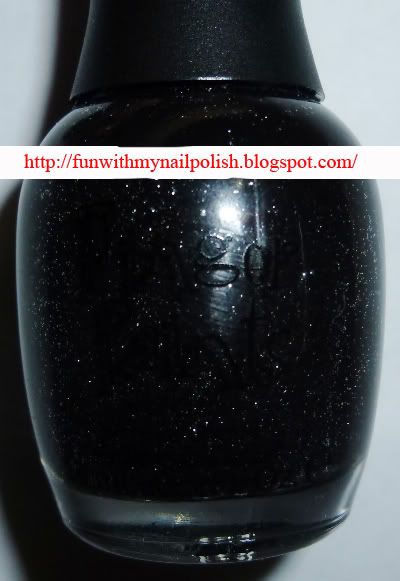
I have done a swatch of FingerPaints: Where Art Renoir? before, and you can see it here, but that was on a very shorty, stubby nail and the lighting was horrible. So I figured that I would do it again.

This polish goes on very easily, but it dries a bit rough, so you might want to use a top coat with it.
This product were bought with my own money for review by myself.
Friday, 6 April 2012
Sally Girl Mini Nail Polish - Poser 812051 swatch
I have used Poser in a few of my nail challenge manicures already, so I figured it was time that it got its own swatch post.
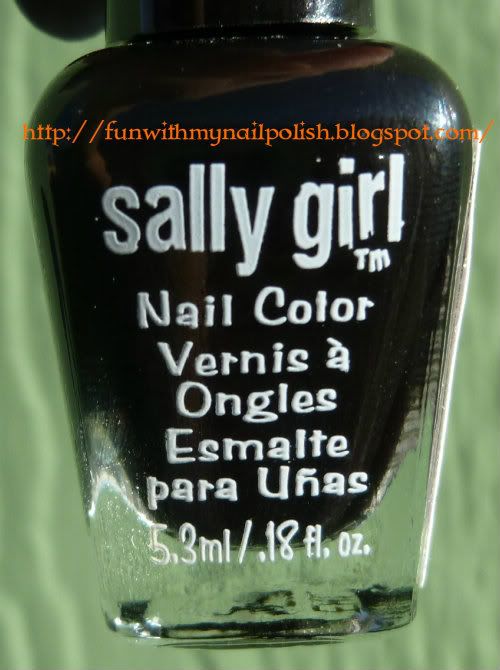
As you can see Poser is a creme polish.
It is a nice basic black polish. Easy to work with and dries quickly. I have never had a bubble problem with it and it has always turned out nice a shiny.
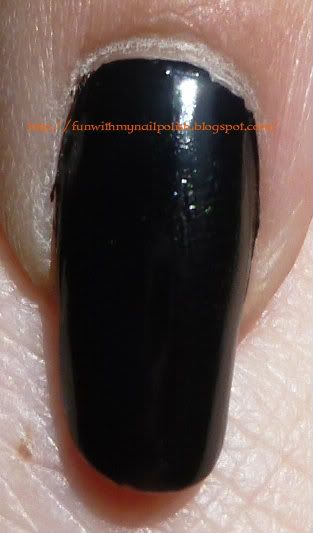
These products were bought with my own money for review by myself.
As you can see Poser is a creme polish.
It is a nice basic black polish. Easy to work with and dries quickly. I have never had a bubble problem with it and it has always turned out nice a shiny.
These products were bought with my own money for review by myself.
Tuesday, 13 March 2012
Week 10- Polka Dot Manicure (Wonder Girls - Be My Baby inspired nails)
I am a week off of the challenge, but hopefully I will catchup this week.
So, I watch a lot of Korean television shows and Korean music videos. The Wonder Girls are really popular in Korea and parts of Asia, they also toured the U.S. with the Jonas Brothers. Their newest music video, "Be My Baby" actually came out a few months ago, but it was the inspiration for this manicure.
If you need subtitles just click on the closed caption (CC) option.
My inspiration was Sohee's yellow and green polka dot dress:

I didn't have yellow, so I just used a neon green. Here are the colors that I used:
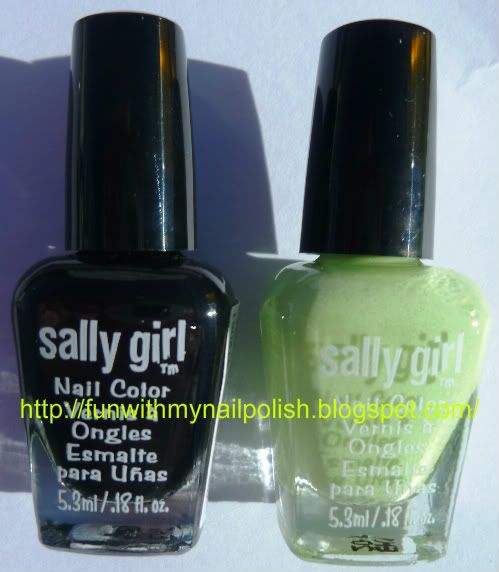
They are Sally Mini Nail Polishes in Poser on the left and Pea-Body on the right.
First I painted my nails with Poser.
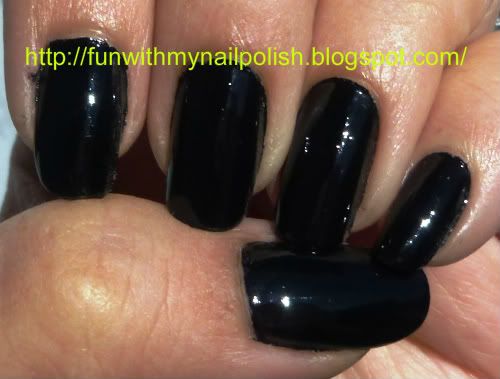
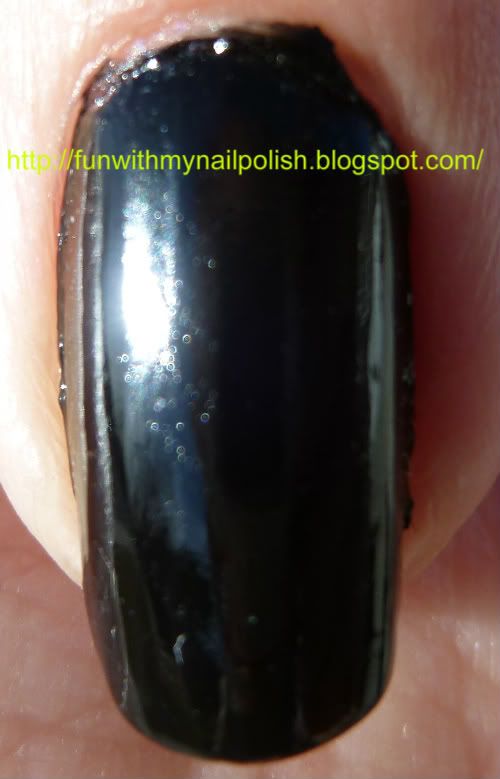
This is a really nice creme polish, it takes two coats for me and dries quickly.
On my first attempt, which I tried back in December, I used a dotting tool (for the first time) and it was blobby and kind of runny.
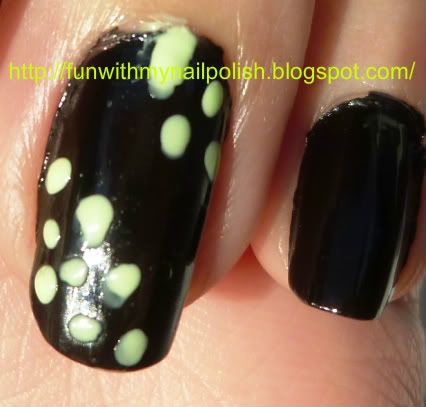
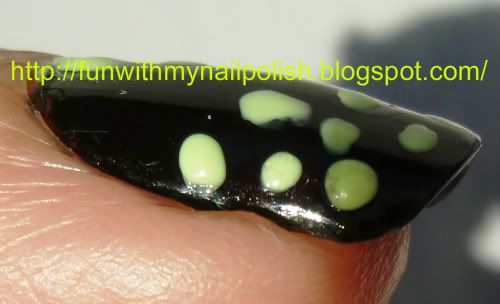
On my second attempt I placed a pair of peridot rhinestones first, I used the head of a straight pin for the larger dots and an art brush to make the smaller dots.
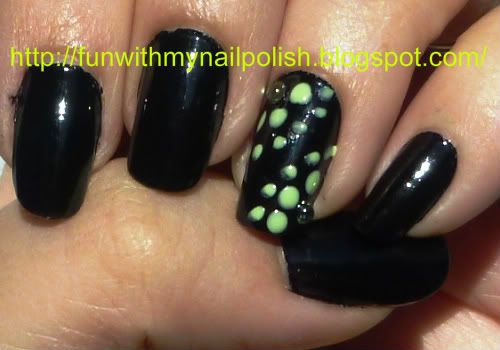
Here are some closer pictures:

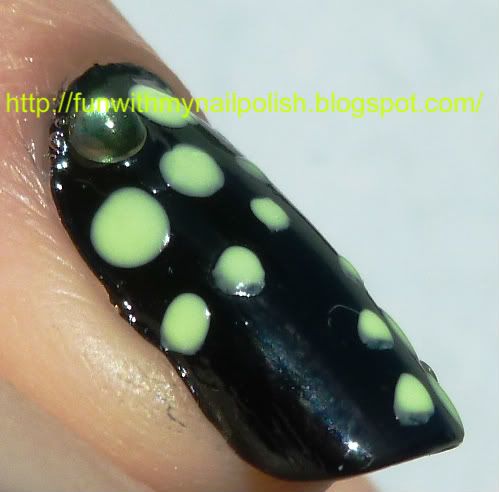
I think my second attempt is much better than the first, not perfect, but better. What do you think?
I will hopefully get out the week 11 challenge in the next couple of days.
These products were bought with my own money for review by myself.
So, I watch a lot of Korean television shows and Korean music videos. The Wonder Girls are really popular in Korea and parts of Asia, they also toured the U.S. with the Jonas Brothers. Their newest music video, "Be My Baby" actually came out a few months ago, but it was the inspiration for this manicure.
If you need subtitles just click on the closed caption (CC) option.
My inspiration was Sohee's yellow and green polka dot dress:
I didn't have yellow, so I just used a neon green. Here are the colors that I used:
They are Sally Mini Nail Polishes in Poser on the left and Pea-Body on the right.
First I painted my nails with Poser.
This is a really nice creme polish, it takes two coats for me and dries quickly.
On my first attempt, which I tried back in December, I used a dotting tool (for the first time) and it was blobby and kind of runny.
On my second attempt I placed a pair of peridot rhinestones first, I used the head of a straight pin for the larger dots and an art brush to make the smaller dots.
Here are some closer pictures:
I think my second attempt is much better than the first, not perfect, but better. What do you think?
I will hopefully get out the week 11 challenge in the next couple of days.
These products were bought with my own money for review by myself.
Monday, 5 March 2012
Week 8- Corest Manicure
I have been sick again, and over all blecky. My internet was also out for a couple of days, so I am really late.
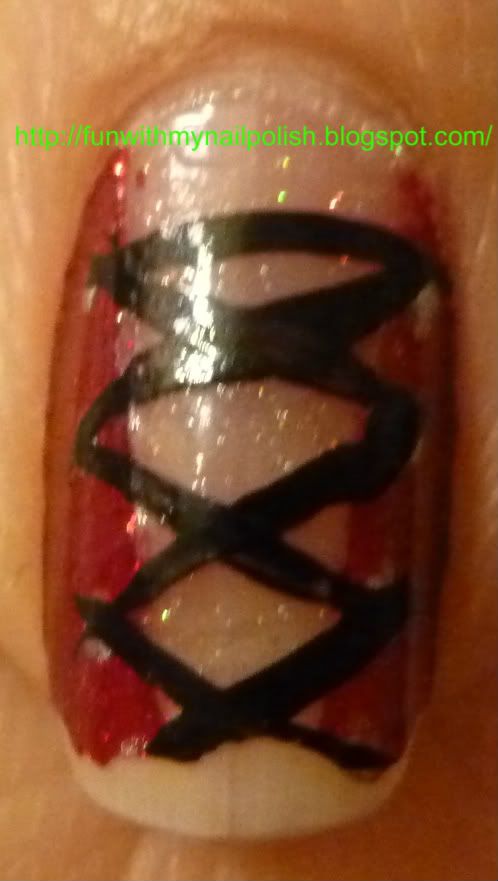
I didn't take pictures of this manicure until it had been on for over a week, so as you can see in the pictures there is tip wear and chipping. :\
I really like manicures, so I was looking forward to this manicure. These picture were all taken indoors, so not the best lighting.
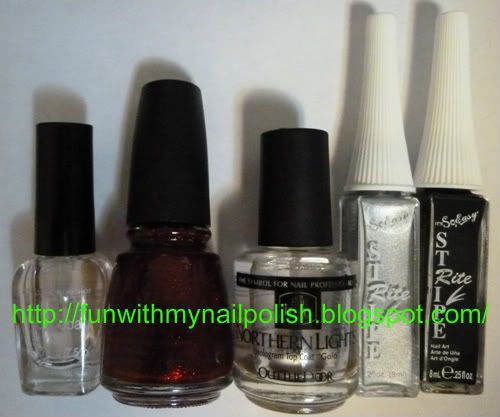
We have from left to right: The Color Workshop top coat, Northern Lights Hologram Gold Top Coat, China Glaze: Ruby Pumps, Stripe Rite: Silver, Stripe Rite: Black
Here is the full manicure:
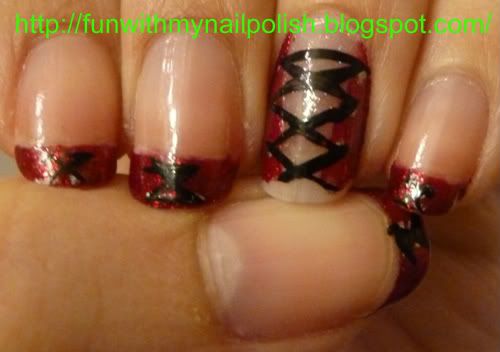
The accent nail (sorry about the chipping):
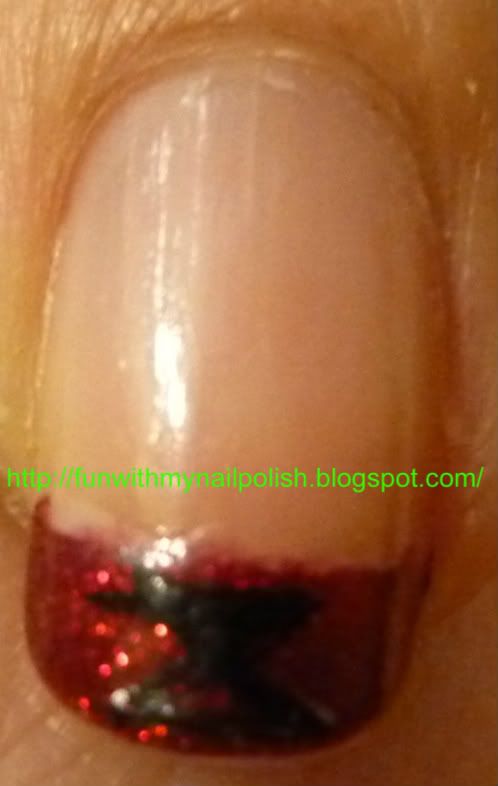
And the waist cincher French tips:
I feel better now, but as you can see I am already late with the vintage and polka dot manicures, hopefully I will be able to post it tomorrow.
Unfortunately I broke one of my nails while trying to open a door :\
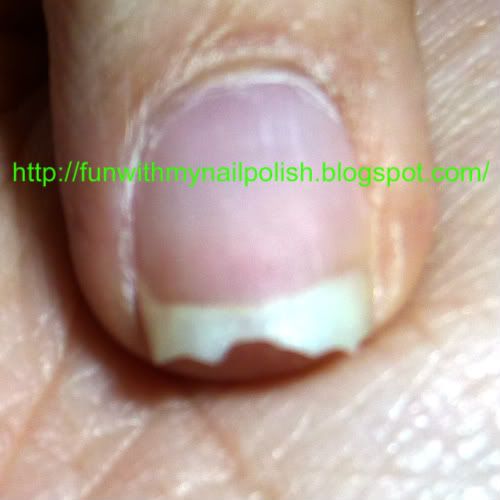
So I will be back to nubbins soon in the pictures.
These products were bought with my own money for review by myself.
I didn't take pictures of this manicure until it had been on for over a week, so as you can see in the pictures there is tip wear and chipping. :\
I really like manicures, so I was looking forward to this manicure. These picture were all taken indoors, so not the best lighting.
We have from left to right: The Color Workshop top coat, Northern Lights Hologram Gold Top Coat, China Glaze: Ruby Pumps, Stripe Rite: Silver, Stripe Rite: Black
Here is the full manicure:
The accent nail (sorry about the chipping):
And the waist cincher French tips:
I feel better now, but as you can see I am already late with the vintage and polka dot manicures, hopefully I will be able to post it tomorrow.
Unfortunately I broke one of my nails while trying to open a door :\
So I will be back to nubbins soon in the pictures.
These products were bought with my own money for review by myself.
Tuesday, 3 January 2012
Split personality nails
My nails have a split personality right now. Yesterday while I was sick I started on doing some nail art on my left hand, that I will hopefully turn out good and I'll post it up soon. But then Jennafroggy posted the 2012 challenge and on my right had I started the challenge.
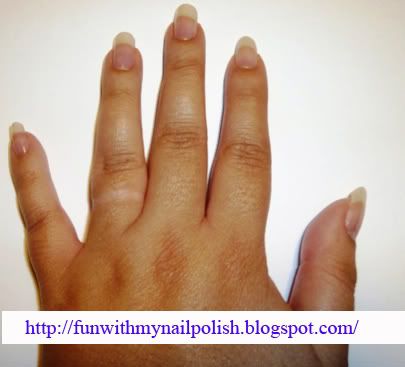
Here is my left hand with Sally Girl mini nail polish 812051 (I believe this color is called "Poser" but I am not 100% sure.):
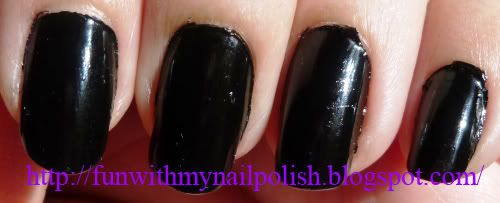
And here is my glitter bombed right hand:
I'll write about the different polishes that were used for that in a different post.
I tried to take a picture of my hands together, but I couldn't get the camera to work with just my chin.
The right hand reminds me of a diva style manicure, while the left hand is a classic polish. Sort of good girl versus band girl polish.
Although I will tell you glitter hides many polish flaws even if they are hard to take off afterwards, while creme polishes collect dust like crazy.
These products were bought with my own money for review by myself.
Here is my left hand with Sally Girl mini nail polish 812051 (I believe this color is called "Poser" but I am not 100% sure.):
And here is my glitter bombed right hand:
I'll write about the different polishes that were used for that in a different post.
I tried to take a picture of my hands together, but I couldn't get the camera to work with just my chin.
The right hand reminds me of a diva style manicure, while the left hand is a classic polish. Sort of good girl versus band girl polish.
Although I will tell you glitter hides many polish flaws even if they are hard to take off afterwards, while creme polishes collect dust like crazy.
These products were bought with my own money for review by myself.
Challenge 2012
Jenn over at I'm still thinking posted a year's worth of nail manicures to try, one a week. I signed myself up. If you'd like to join sign yourself up at her blog so everyone can see your work. :)
1. Jan. 1st - "Make it Sparkle" Mani.
- Pull out your Best looking glitter, flakie or holo and bring in the New Year with a "Bang".
2. Jan. 8th - French Tip Mani.
3. Jan. 15th - Color Block Mani.
4. Jan. 22nd - Plaid Mani.
5. Jan. 29th - Newspaper Mani.
6. Feb. 5th - Half-moon Mani.
7. Feb. 12th - "Valentine's Day" Mani.
8. Feb. 19th - Corset Mani.
9. Feb. 26th - "Vintage" Mani.
10. Mar. 4th - Polka Dot Mani
11. Mar. 11th - "St. Patrick's Day" Mani.
12. Mar. 18th - Skittle Mani.
13. Mar. 25th - Ruffian Mani.
14. Apr. 1st - Striped Mani.
15. Apr. 8th - "Easter Day" Mani.
16. Apr. 15th - Dotticure Mani.
17. Apr. 22nd - "Earth Appreciation" Mani.
18. Apr. 29th - Cartoon Mani.
19. May. 6th - Floral Mani.
20. May. 13th - Bows Mani.
21. May. 20th - Fruit Mani.
22. May. 27th - Splatter Mani.
23. Jun. 3rd - Ombre Mani.
24. Jun. 10th - Flag Mani.
25. Jun. 17th - Pride/Rainbow Mani.
26. Jun. 24th - Neon Mani.
27. July. 1st - "4th of July" Mani.
28. July. 8th - Gradient Mani.
29. July. 15th - "Rockstar" Mani.
30. July. 22th - Water Marble Mani.
31. July. 29th - Crackle Mani.
32. Aug. 5th - Needle Marble Mani.
33. Aug. 12th - Galaxy Mani.
34. Aug. 19th - "Bling" Mani.
35. Aug. 26th - Cupcake Mani.
36. Sept. 2nd - Tape Mani.
37. Sept. 9th - "We Remember 9/11" Mani.
38. Sept. 16th - Metallic/Magnetic Mani.
39. Sept. 23rd - Dry Marble Mani.
40. Sept. 30th - Animal Print Mani.
41. Oct. 7th - Patchwork Mani.
42. Oct. 14th - "Pink 4 Breast Cancer Awareness" Mani.
43. Oct. 21st - Spider Web Mani.
44. Oct. 28th - Halloween Mani.
45. Nov. 4th - Tribal Mani.
46. Nov. 11th - "Mustach, 4 Movember; Prostate Cancer Awareness" Mani.
47. Nov. 18th - Thanksgiving Day Mani.
48. Nov. 25th - Feather Mani.
49. Dec. 2nd - Glitter Sandwich Mani.
50. Dec. 9th - Snowflake Mani.
51. Dec. 16th - Red Mani.
52. Dec. 23rd - Christmas Mani.
I don't know what some of these are and had to search on Google to find out.
1. Jan. 1st - "Make it Sparkle" Mani.
- Pull out your Best looking glitter, flakie or holo and bring in the New Year with a "Bang".
2. Jan. 8th - French Tip Mani.
3. Jan. 15th - Color Block Mani.
4. Jan. 22nd - Plaid Mani.
5. Jan. 29th - Newspaper Mani.
6. Feb. 5th - Half-moon Mani.
7. Feb. 12th - "Valentine's Day" Mani.
8. Feb. 19th - Corset Mani.
9. Feb. 26th - "Vintage" Mani.
10. Mar. 4th - Polka Dot Mani
11. Mar. 11th - "St. Patrick's Day" Mani.
12. Mar. 18th - Skittle Mani.
13. Mar. 25th - Ruffian Mani.
14. Apr. 1st - Striped Mani.
15. Apr. 8th - "Easter Day" Mani.
16. Apr. 15th - Dotticure Mani.
17. Apr. 22nd - "Earth Appreciation" Mani.
18. Apr. 29th - Cartoon Mani.
19. May. 6th - Floral Mani.
20. May. 13th - Bows Mani.
21. May. 20th - Fruit Mani.
22. May. 27th - Splatter Mani.
23. Jun. 3rd - Ombre Mani.
24. Jun. 10th - Flag Mani.
25. Jun. 17th - Pride/Rainbow Mani.
26. Jun. 24th - Neon Mani.
27. July. 1st - "4th of July" Mani.
28. July. 8th - Gradient Mani.
29. July. 15th - "Rockstar" Mani.
30. July. 22th - Water Marble Mani.
31. July. 29th - Crackle Mani.
32. Aug. 5th - Needle Marble Mani.
33. Aug. 12th - Galaxy Mani.
34. Aug. 19th - "Bling" Mani.
35. Aug. 26th - Cupcake Mani.
36. Sept. 2nd - Tape Mani.
37. Sept. 9th - "We Remember 9/11" Mani.
38. Sept. 16th - Metallic/Magnetic Mani.
39. Sept. 23rd - Dry Marble Mani.
40. Sept. 30th - Animal Print Mani.
41. Oct. 7th - Patchwork Mani.
42. Oct. 14th - "Pink 4 Breast Cancer Awareness" Mani.
43. Oct. 21st - Spider Web Mani.
44. Oct. 28th - Halloween Mani.
45. Nov. 4th - Tribal Mani.
46. Nov. 11th - "Mustach, 4 Movember; Prostate Cancer Awareness" Mani.
47. Nov. 18th - Thanksgiving Day Mani.
48. Nov. 25th - Feather Mani.
49. Dec. 2nd - Glitter Sandwich Mani.
50. Dec. 9th - Snowflake Mani.
51. Dec. 16th - Red Mani.
52. Dec. 23rd - Christmas Mani.
I don't know what some of these are and had to search on Google to find out.
Tuesday, 6 December 2011
Finger Paints: Where Art Renoir? swatch
I promise that this is FingerPaints: Where Art Renoir? It is just hard to read the label since it is printed in black and the nail polish is black.
And here is my swatch example:
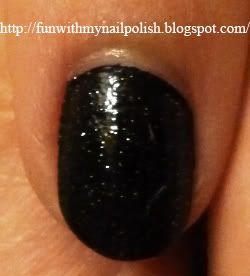
This is two coats of FingerPaints: Where Art Renoir? and two top coats of Sally Hansen Super Shine . This color from Finger Paints dries really rough, so if you want your nail to feel glossy you have to use a top coat. One coat of the top coat smoothed out most of the roughness, but it took a second coat to make it completely smooth. Otherwise the color is great. It is really opaque. I love the color and it would probably work great if you were doing galaxy style nails.
EDIT: You can see a better picture swatch here
These products were bought with my own money for review by myself.
And here is my swatch example:
This is two coats of FingerPaints: Where Art Renoir? and two top coats of Sally Hansen Super Shine . This color from Finger Paints dries really rough, so if you want your nail to feel glossy you have to use a top coat. One coat of the top coat smoothed out most of the roughness, but it took a second coat to make it completely smooth. Otherwise the color is great. It is really opaque. I love the color and it would probably work great if you were doing galaxy style nails.
EDIT: You can see a better picture swatch here
These products were bought with my own money for review by myself.
Monday, 5 December 2011
Finger Paints: Where Art Renoir? and Northern Lights: Hologram Gold Top Coat
I am back with another nail polish demonstration.
After scrubbing with nail polish remover for a long time I finally got the red glitter off of my nails.
I started with a coat of Sally Hansen Super Shine again.
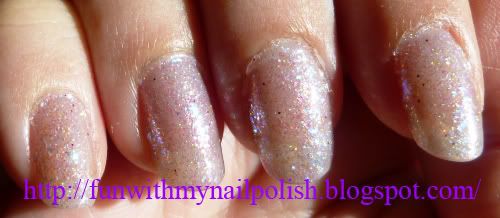
Then I added a coat of Northern Lights Hologram Gold Top Coat
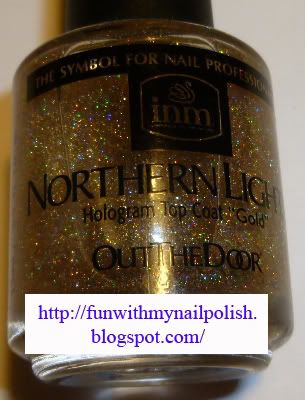
This is the bottle all shaken up, it has been over thirty minutes and the glitter still hasn't settled down.
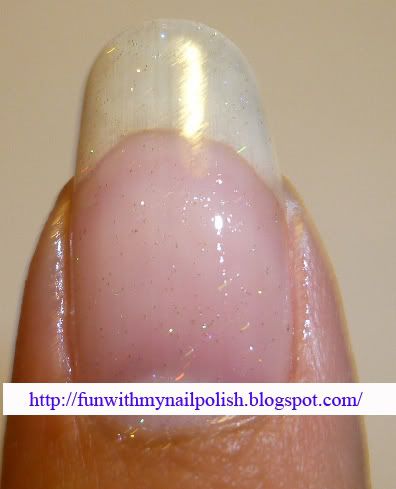
One coat of polish.
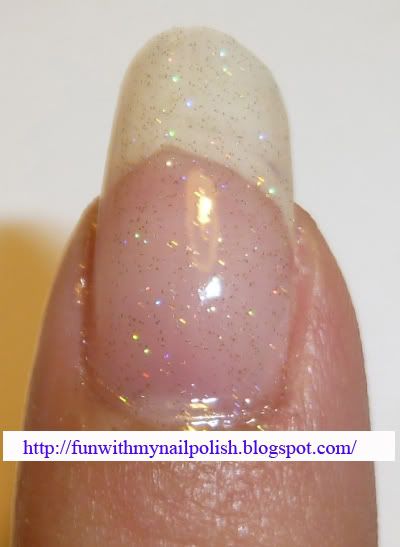
Two coats of polish.
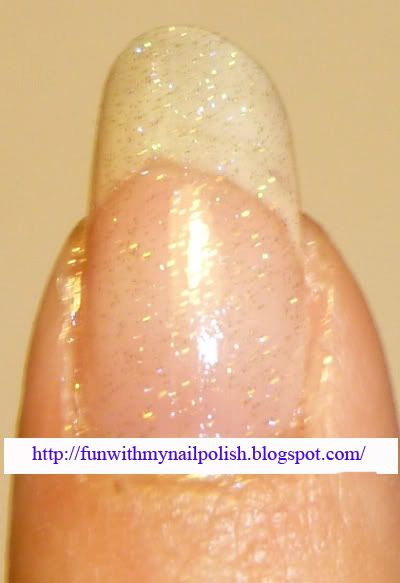
Three coats of polish.
Have you ever tried using those French tip nail sticker guides? Like these? I have and it has never turned out right for me. So I read about using painter's tape and tried it out since I already had some on hand.
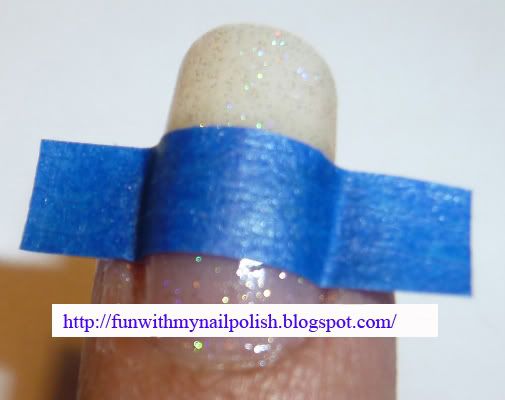
This is how you place it, make sure it seals completely at the edges of your nail.
I then used FingerPaints Where Art Renoir? for the tip.
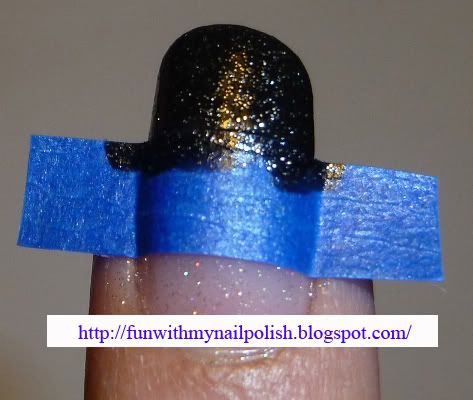
Here is one coat of the Where Art Renoir? It is opaque even in thin coats.
And here are the finished nails.
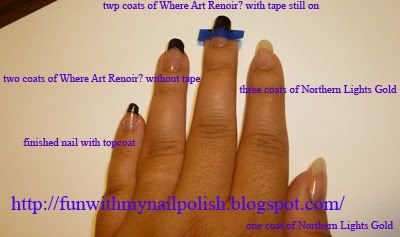
I would say that these do need a topcoat. It doesn't look it in the picture, but the tip on my ring finger the Where Art Renoir? is a bit dull without a topcoat. Also there is a rough edge where the Where Art Renoir? compared to the Northern Lights Gold.
After scrubbing with nail polish remover for a long time I finally got the red glitter off of my nails.
I started with a coat of Sally Hansen Super Shine again.
Then I added a coat of Northern Lights Hologram Gold Top Coat
This is the bottle all shaken up, it has been over thirty minutes and the glitter still hasn't settled down.
One coat of polish.
Two coats of polish.
Three coats of polish.
Have you ever tried using those French tip nail sticker guides? Like these? I have and it has never turned out right for me. So I read about using painter's tape and tried it out since I already had some on hand.
This is how you place it, make sure it seals completely at the edges of your nail.
I then used FingerPaints Where Art Renoir? for the tip.
Here is one coat of the Where Art Renoir? It is opaque even in thin coats.
And here are the finished nails.
I would say that these do need a topcoat. It doesn't look it in the picture, but the tip on my ring finger the Where Art Renoir? is a bit dull without a topcoat. Also there is a rough edge where the Where Art Renoir? compared to the Northern Lights Gold.
Subscribe to:
Posts (Atom)
