A list of swatch pictures and blog posts after the jump
Showing posts with label Northern Lights. Show all posts
Showing posts with label Northern Lights. Show all posts
Sunday, 6 December 2020
Thursday, 22 March 2012
Week 11- St. Patrick's Day manicure
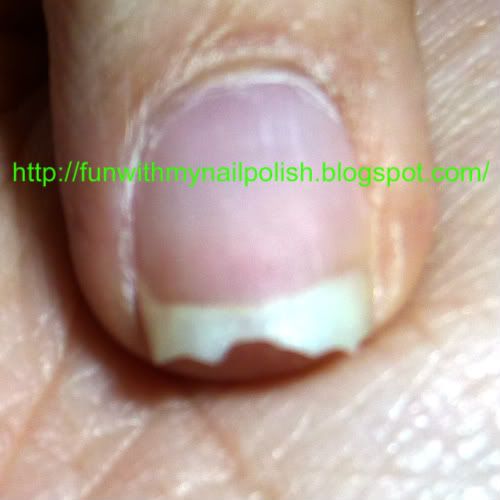
Before I had a chance to get to this manicure I broke another nail, my pinkie nail, and this one is through to the nail bed.
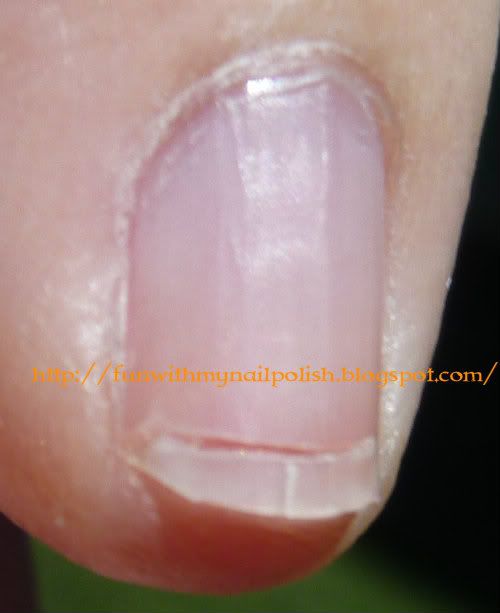
I don't dare put any polish on it, since just water makes it sting. So, for the next couple of weeks I will be doing three fingers and a thumb pictures.
Here are this week's cast of polishes:
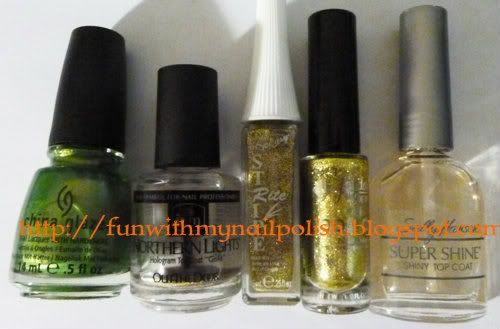
From left to right:China Glaze: Cha Cha Cha, Northern Lights Hologram Gold Top Coat, So Easy Stripe Rite in Gold Glitter, Jordana Pop Art 509 Golden Artist, and Sally Hansen Super Shine
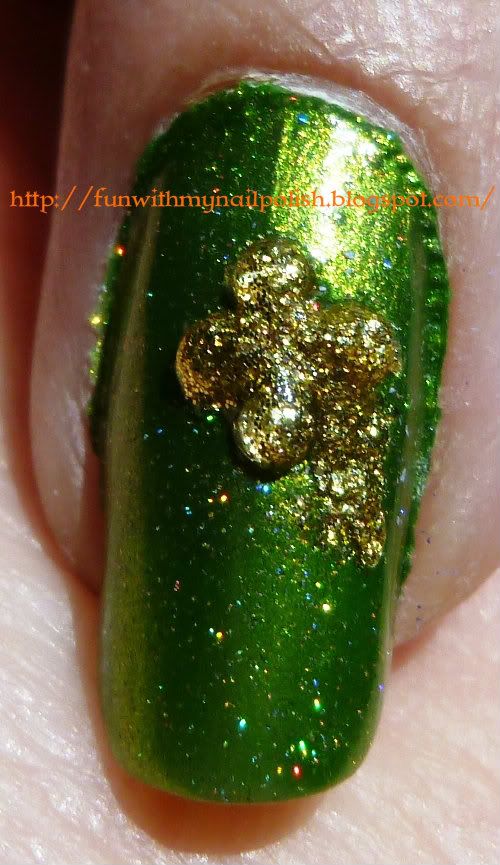
To begin I painted China Glaze: Cha Cha Cha on my ring finger and did French tips on my remaining fingers and thumb. I then painted Northern Lights Hologram Gold Top Coat on all of the fingers, but I think I should have left the Cha Cha Cha parts without it once I saw it afterwards. I then added a strip of gold with So Easy Stripe Rite in Gold Glitter and sealed with Sally Hansen Super Shine.

On the ring finger I added four tear drop shaped rhinestones, to make a sort of clover. I added both the So Easy Stripe Rite gold glitter and Jordana Pop Art 509 Golden Artist to cover the rhinestones and make a little stem for the clover.
And here is the whole look:
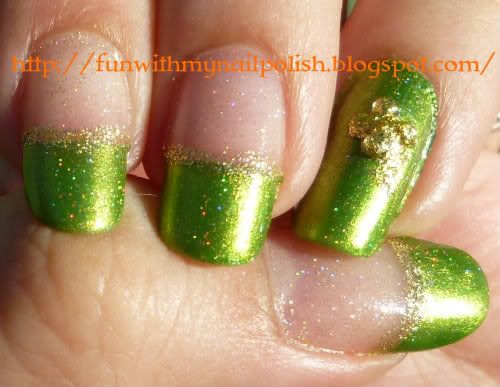
I am glad that I found Cha Cha Cha. The formula was wonderful and very easy to work with. It dried quickly, I didn't wake up with sheet marks the next morning, which happens to me so often since I tend to do my nails late at night.
These products were bought with my own money for review by myself.
I don't dare put any polish on it, since just water makes it sting. So, for the next couple of weeks I will be doing three fingers and a thumb pictures.
Here are this week's cast of polishes:
From left to right:China Glaze: Cha Cha Cha, Northern Lights Hologram Gold Top Coat, So Easy Stripe Rite in Gold Glitter, Jordana Pop Art 509 Golden Artist, and Sally Hansen Super Shine
To begin I painted China Glaze: Cha Cha Cha on my ring finger and did French tips on my remaining fingers and thumb. I then painted Northern Lights Hologram Gold Top Coat on all of the fingers, but I think I should have left the Cha Cha Cha parts without it once I saw it afterwards. I then added a strip of gold with So Easy Stripe Rite in Gold Glitter and sealed with Sally Hansen Super Shine.
On the ring finger I added four tear drop shaped rhinestones, to make a sort of clover. I added both the So Easy Stripe Rite gold glitter and Jordana Pop Art 509 Golden Artist to cover the rhinestones and make a little stem for the clover.
And here is the whole look:
I am glad that I found Cha Cha Cha. The formula was wonderful and very easy to work with. It dried quickly, I didn't wake up with sheet marks the next morning, which happens to me so often since I tend to do my nails late at night.
These products were bought with my own money for review by myself.
Monday, 5 March 2012
Week 8- Corest Manicure
I have been sick again, and over all blecky. My internet was also out for a couple of days, so I am really late.
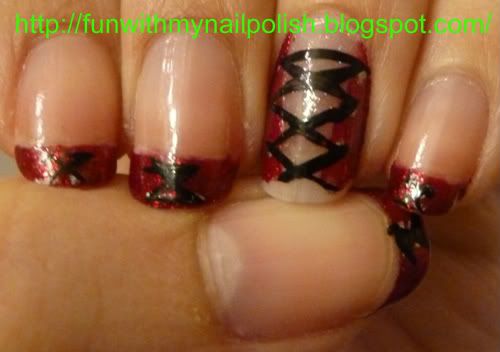
I didn't take pictures of this manicure until it had been on for over a week, so as you can see in the pictures there is tip wear and chipping. :\
I really like manicures, so I was looking forward to this manicure. These picture were all taken indoors, so not the best lighting.
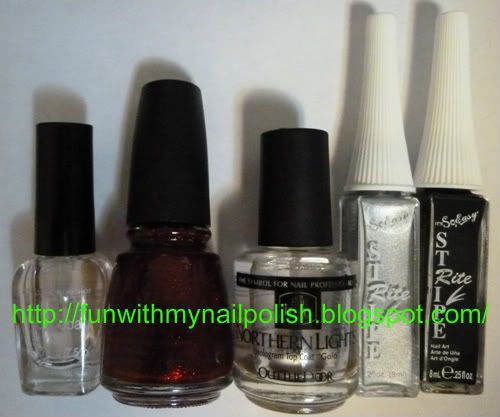
We have from left to right: The Color Workshop top coat, Northern Lights Hologram Gold Top Coat, China Glaze: Ruby Pumps, Stripe Rite: Silver, Stripe Rite: Black
Here is the full manicure:
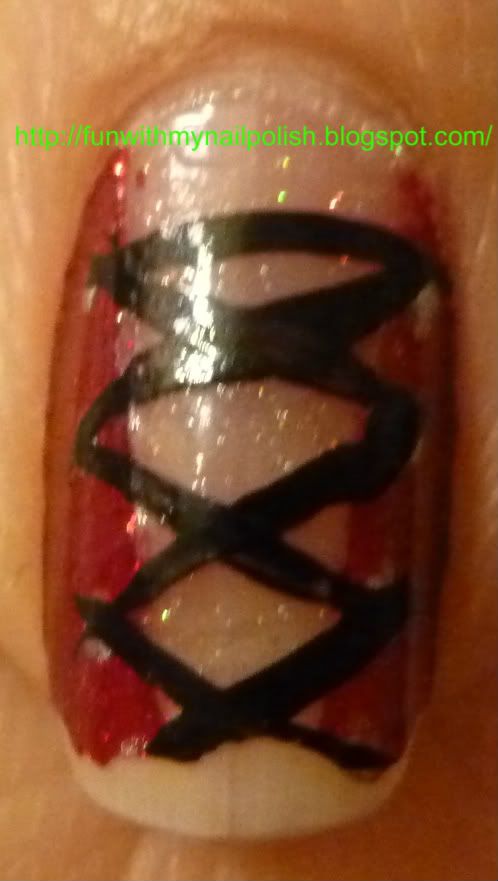
The accent nail (sorry about the chipping):
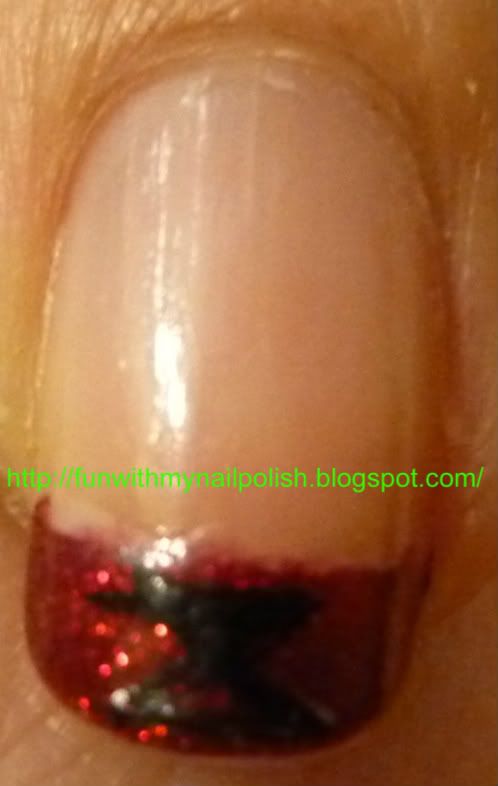
And the waist cincher French tips:
I feel better now, but as you can see I am already late with the vintage and polka dot manicures, hopefully I will be able to post it tomorrow.
Unfortunately I broke one of my nails while trying to open a door :\
So I will be back to nubbins soon in the pictures.
These products were bought with my own money for review by myself.
I didn't take pictures of this manicure until it had been on for over a week, so as you can see in the pictures there is tip wear and chipping. :\
I really like manicures, so I was looking forward to this manicure. These picture were all taken indoors, so not the best lighting.
We have from left to right: The Color Workshop top coat, Northern Lights Hologram Gold Top Coat, China Glaze: Ruby Pumps, Stripe Rite: Silver, Stripe Rite: Black
Here is the full manicure:
The accent nail (sorry about the chipping):
And the waist cincher French tips:
I feel better now, but as you can see I am already late with the vintage and polka dot manicures, hopefully I will be able to post it tomorrow.
Unfortunately I broke one of my nails while trying to open a door :\
So I will be back to nubbins soon in the pictures.
These products were bought with my own money for review by myself.
Sunday, 12 February 2012
Week 7- Valentine's manicure
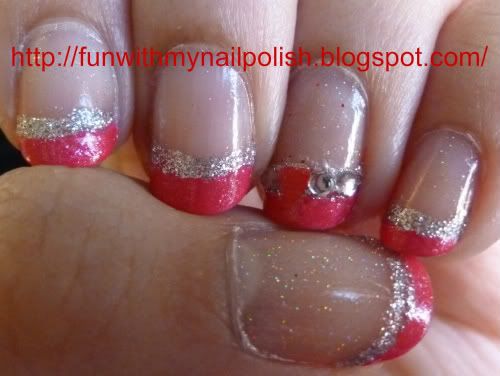
I don't normally do pink or girly nails, but for Valentine's day I did. For my Valentine's manicure I used these products:

From left to right: Northern Lights Hologram Gold Top Coat, FingerPaints: Watermelon Watercolor, Pure Ice: Watermelon Ice, Jordana: Pop Art in Star Designer and Red of Hearts, and The Color Workshop top coat.
First I used one coat of the Hologram Gold, then I taped off for French tips. I painted the tip part with two coats of Finger Paints: Watermelon Watercolor, and after that dried I added one coat of Pure Ice: Watermelon Ice for a bit of sparkle. After taking the tape off I did some clean up with a Q-tip dipped in nail polish remover. Then I added another coat of Hologram Gold, but just to the top bit of nail. I free handed a strip of Star Designer and then a top coat to seal.
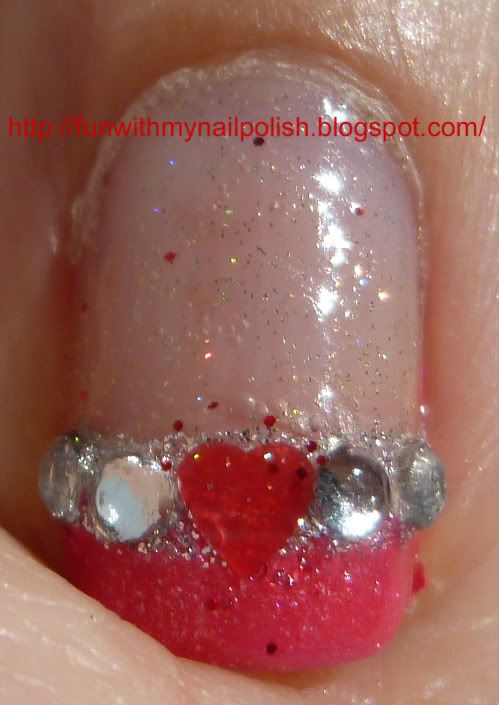
On my ring finger I did things a bit differently. After the strip of Star Designer I added a coat of Red of Hearts, placed the four rhinestones and fished out one of the hearts in the Red of Hearts polish. Because the Red of Hearts polish is a bit cloudy I added a coat of Hologram Gold to the top part and then sealed with a top coat.
These products were bought with my own money for review by myself.
From left to right: Northern Lights Hologram Gold Top Coat, FingerPaints: Watermelon Watercolor, Pure Ice: Watermelon Ice, Jordana: Pop Art in Star Designer and Red of Hearts, and The Color Workshop top coat.
First I used one coat of the Hologram Gold, then I taped off for French tips. I painted the tip part with two coats of Finger Paints: Watermelon Watercolor, and after that dried I added one coat of Pure Ice: Watermelon Ice for a bit of sparkle. After taking the tape off I did some clean up with a Q-tip dipped in nail polish remover. Then I added another coat of Hologram Gold, but just to the top bit of nail. I free handed a strip of Star Designer and then a top coat to seal.
On my ring finger I did things a bit differently. After the strip of Star Designer I added a coat of Red of Hearts, placed the four rhinestones and fished out one of the hearts in the Red of Hearts polish. Because the Red of Hearts polish is a bit cloudy I added a coat of Hologram Gold to the top part and then sealed with a top coat.
These products were bought with my own money for review by myself.
Thursday, 29 December 2011
Four Quick and Easy New Year's nail styles
I wanted to show you four quick and easy nail styles for New Year's Eve.
I will actually show you the worst photo first.
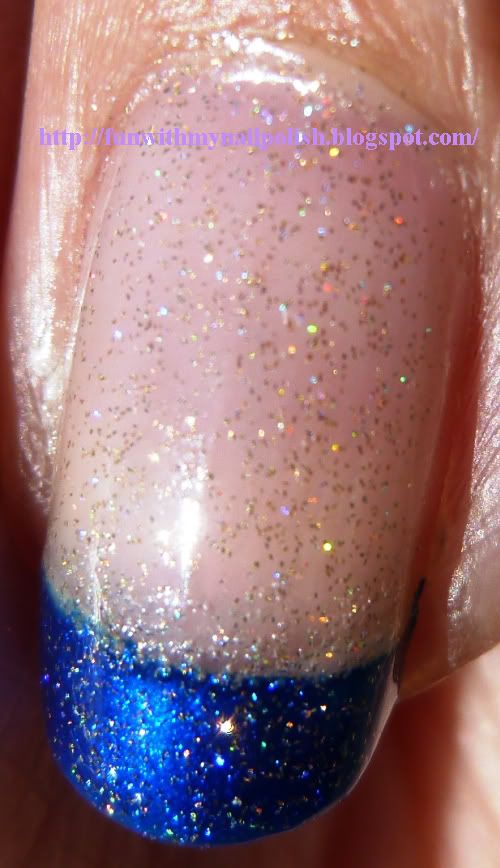
I thought that the blue (FingerPaints: Cerulean Seascape) had dried completely before I put down the tape, but apparently it hadn't! And some of the blue polish lifted with the tape. The idea of this nail is a blue polish with a glitter tip, just make sure that your blue polish is completely dry before you put down your tape!
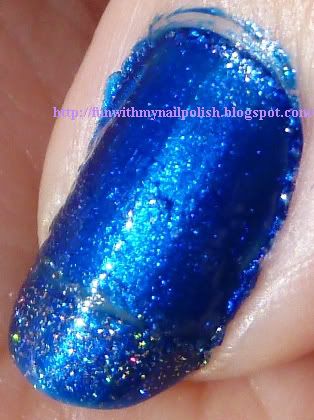
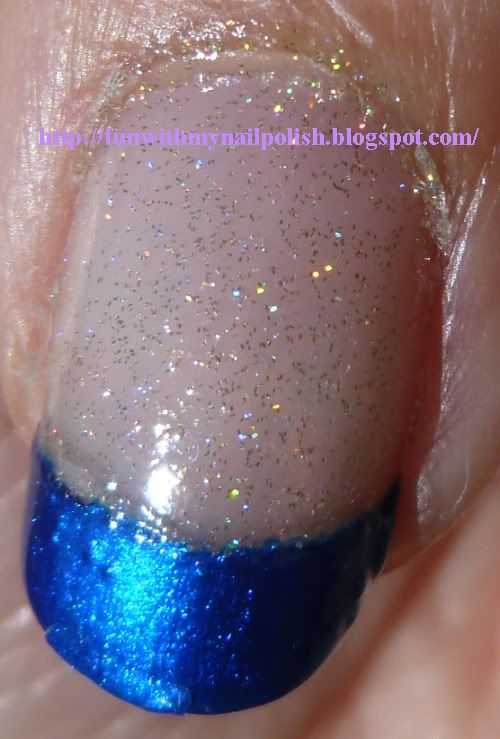
This next nail has a blue polish tip with Northern Lights Hologram Gold Top Coat. For some reason the picture is huge!
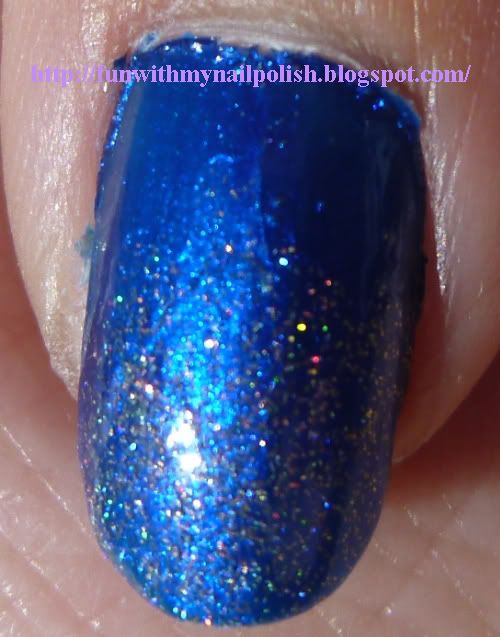
I like the next one the best, it is three coats of Northern Lights Hologram Gold Top Coat and over the tip is painted with FingerPaints: Cerulean Seascape
I like this one the best, but I had washed dishes before taking this picture and the paint chipped, you can see it in the picture if you look for it.
The last one is three layers of FingerPaints: Cerulean Seascape and a couple of pulls of Northern Lights Hologram Gold Top Coat from the tip of the nails toward the bed of the nails.
If you want to do any of these styles for New Year's I would use a gold toned glitter, because I personally find an opalescent glitter reminds me more of winter. Another option would be to use a black polish and a silver glitter polish.
These products were bought with my own money for review by myself.
I will actually show you the worst photo first.
I thought that the blue (FingerPaints: Cerulean Seascape) had dried completely before I put down the tape, but apparently it hadn't! And some of the blue polish lifted with the tape. The idea of this nail is a blue polish with a glitter tip, just make sure that your blue polish is completely dry before you put down your tape!
This next nail has a blue polish tip with Northern Lights Hologram Gold Top Coat. For some reason the picture is huge!
I like the next one the best, it is three coats of Northern Lights Hologram Gold Top Coat and over the tip is painted with FingerPaints: Cerulean Seascape
I like this one the best, but I had washed dishes before taking this picture and the paint chipped, you can see it in the picture if you look for it.
The last one is three layers of FingerPaints: Cerulean Seascape and a couple of pulls of Northern Lights Hologram Gold Top Coat from the tip of the nails toward the bed of the nails.
If you want to do any of these styles for New Year's I would use a gold toned glitter, because I personally find an opalescent glitter reminds me more of winter. Another option would be to use a black polish and a silver glitter polish.
These products were bought with my own money for review by myself.
Monday, 5 December 2011
Finger Paints: Where Art Renoir? and Northern Lights: Hologram Gold Top Coat
I am back with another nail polish demonstration.
After scrubbing with nail polish remover for a long time I finally got the red glitter off of my nails.
I started with a coat of Sally Hansen Super Shine again.
Then I added a coat of Northern Lights Hologram Gold Top Coat
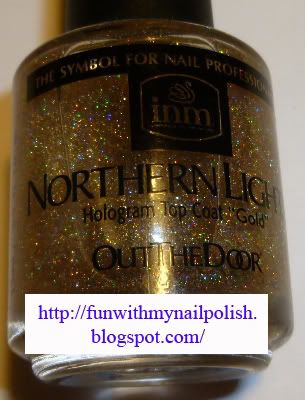
This is the bottle all shaken up, it has been over thirty minutes and the glitter still hasn't settled down.
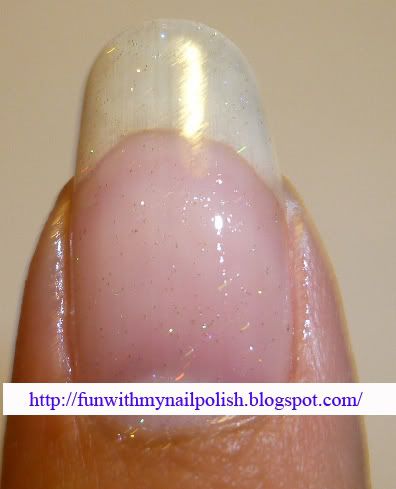
One coat of polish.
Two coats of polish.

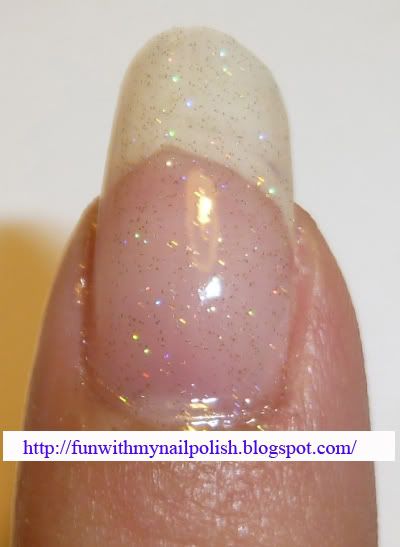
Three coats of polish.
Have you ever tried using those French tip nail sticker guides? Like these? I have and it has never turned out right for me. So I read about using painter's tape and tried it out since I already had some on hand.
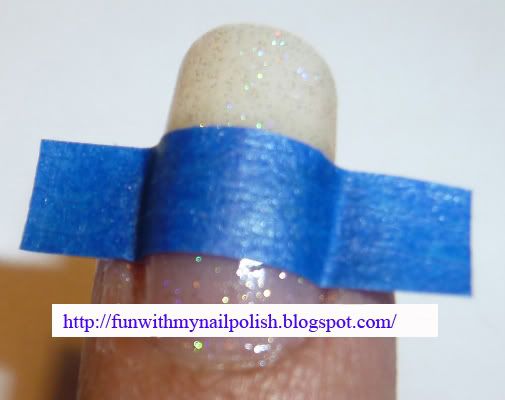
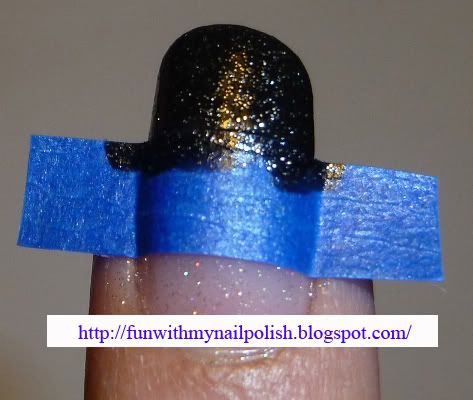
This is how you place it, make sure it seals completely at the edges of your nail.
I then used FingerPaints Where Art Renoir? for the tip.
Here is one coat of the Where Art Renoir? It is opaque even in thin coats.
And here are the finished nails.
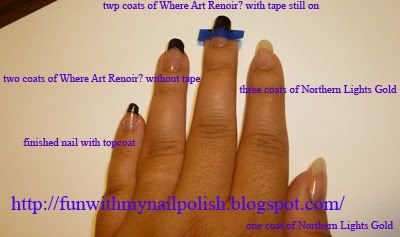
I would say that these do need a topcoat. It doesn't look it in the picture, but the tip on my ring finger the Where Art Renoir? is a bit dull without a topcoat. Also there is a rough edge where the Where Art Renoir? compared to the Northern Lights Gold.
After scrubbing with nail polish remover for a long time I finally got the red glitter off of my nails.
I started with a coat of Sally Hansen Super Shine again.
Then I added a coat of Northern Lights Hologram Gold Top Coat
This is the bottle all shaken up, it has been over thirty minutes and the glitter still hasn't settled down.
One coat of polish.
Two coats of polish.
Three coats of polish.
Have you ever tried using those French tip nail sticker guides? Like these? I have and it has never turned out right for me. So I read about using painter's tape and tried it out since I already had some on hand.
This is how you place it, make sure it seals completely at the edges of your nail.
I then used FingerPaints Where Art Renoir? for the tip.
Here is one coat of the Where Art Renoir? It is opaque even in thin coats.
And here are the finished nails.
I would say that these do need a topcoat. It doesn't look it in the picture, but the tip on my ring finger the Where Art Renoir? is a bit dull without a topcoat. Also there is a rough edge where the Where Art Renoir? compared to the Northern Lights Gold.
Subscribe to:
Posts (Atom)